
There’s something inherently captivating about cooking outdoors—the aroma of wood smoke, the sizzle of food meeting flame, and the joy of gathering around a warm, crackling fire. Cooking over an open flame is more than just preparing a meal; it’s about creating lasting memories with family and friends. However, successful outdoor cooking begins with mastering food-safe fire-starting methods, managing your fire and coal bed effectively, and understanding temperature control—especially when using smokers.
Imagine biting into perfectly smoked brisket, tender ribs, or grilled vegetables infused with subtle smoky notes. These culinary delights start with something fundamental: building the right cooking fire.
Starting Your Cooking Fire Safely:
When it comes to igniting a fire, my trusty chimney starter is my go-to tool. I still remember the first time I decided to give it a whirl. It was a chilly autumn evening, and the leaves were dancing in the breeze. I had invited a few friends over for a barbecue, and I wanted the process of lighting the charcoal to be as quick and hassle-free as possible. Armed with only dry kindling and a natural fire starter, I placed the chimney starter on my grill and filled it with charcoal. It felt good to embrace a more natural approach, avoiding any chemical accelerants that can leave unpleasant residues.
As I lit the fire starter, I marveled at how quickly the flames danced their way up the chimney. In mere moments, the charcoal began to ignite, and I realized how much more efficient this method was compared to others I had tried in the past. The heat intensified, and the smell of smoke wafted through the air, signaling to my friends that the barbecue was officially on. With the chimney starter working its magic, I could now dedicate my attention to preparing the marinated veggies and juicy cuts of meat that awaited their turn on the grill.
Using a chimney starter not only saves time but also ensures a cleaner burn. Traditional methods often result in flare-ups and uneven cooking, but with this simple device, I get a consistent, even heat. The design allows for optimal airflow, which helps the charcoal ignite evenly without the need for chemical help. I remember watching the glowing embers become perfectly ready, realizing how much easier it is to manage the fire once it’s lit. It’s a method that aligns perfectly with my preference for a natural, sustainable cooking experience.
Now, every time I plan an outdoor gathering, my chimney starter is at the top of my must-have list. It’s a small yet powerful tool that has transformed the way I approach starting fires, allowing me to enjoy the process rather than dread it. As my friends gather around the grill, I can proudly say that my fire-starting technique is not just effective but also reflects my commitment to clean, eco-friendly cooking. That simple little chimney starter has become an essential part of my outdoor cooking rituals, ensuring that every fire I light is quick, efficient, and clean.
Fire and Coal Bed Management:
Burning hardwoods down to hot embers is essential for achieving a steady and efficient heat source. Hardwoods such as oak, hickory, and maple burn longer than softwoods, providing sustained warmth that is ideal for cooking and heating. As these woods burn, they convert into glowing embers, which radiate heat effectively. It’s important to choose seasoned hardwoods, as they produce less smoke and ensure a cleaner burn, maximizing your heat output.
Once the hardwoods have turned to embers, the next step is arranging them into heat zones. This technique allows for better control over cooking temperatures, which can be crucial when preparing different types of food simultaneously. By creating hot and cooler zones, you can sear meats over the hottest part of the embers while keeping other dishes warm without direct heat. Using a shovel or a poker, shift the embers based on your cooking needs, ensuring you have areas of various temperatures to work with.
Regular monitoring and adjustment of the embers is necessary to maintain consistent temperatures throughout your cooking process. Factors such as wind, ambient temperatures, and the type of food being cooked can affect heat levels. It’s advisable to keep a close eye on the fire, adding more wood as needed to replenish the embers or redistributing them to ensure even cooking. A temperature gauge can also be beneficial for precise monitoring, enabling you to achieve the perfect results while enjoying your outdoor cooking experience.
Fire Safety Tips:
When setting up a fire, prioritize safety by ensuring it is positioned away from any hazards. This includes keeping it a safe distance from overhanging branches, dry grass, and other flammable materials. It’s essential to be prepared for any emergencies; thus, having water, sand, or a fire extinguisher on hand can make a significant difference. Proactive measures like these not only promote safety but also contribute to a more enjoyable experience around the fire.
Equally important is to never leave your fire unattended. A moment of distraction can lead to dangerous situations, including wildfires. Before departing from the site, take the time to fully extinguish your fire. This involves making sure that all embers are doused with water or dirt and that the area is cool to the touch. By following these practices, you can ensure a safer environment for yourself and others while enjoying the warmth and ambiance of a fire.
Mastering Temperature Control in Smokers:
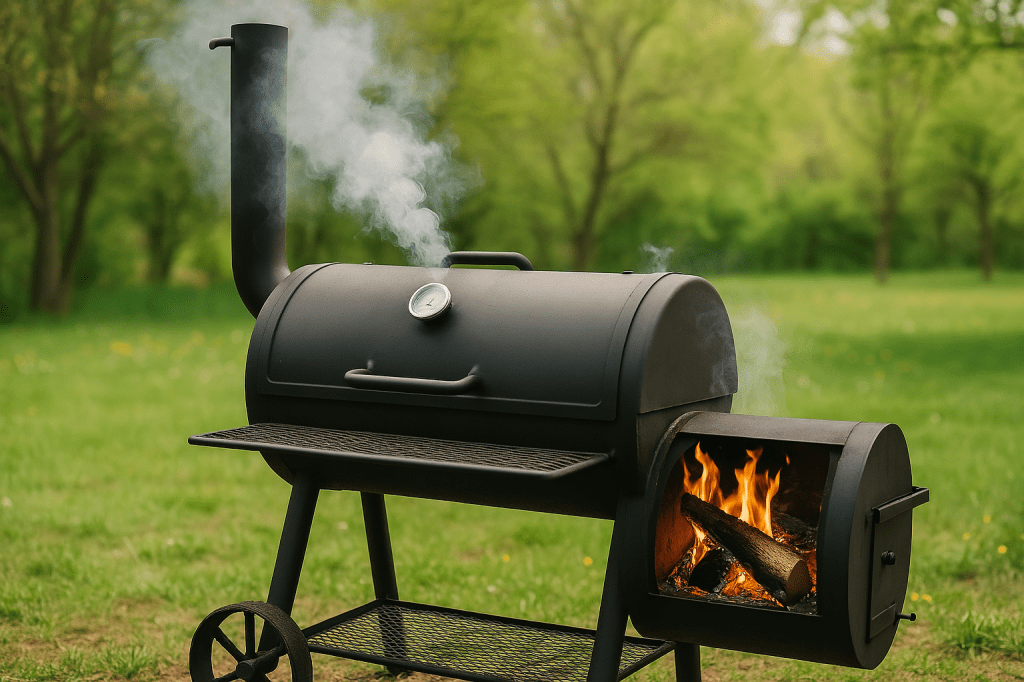
Offset smokers, known for their unique design, require careful management of airflow to maintain the ideal smoking temperature. The damper system allows you to control the amount of oxygen feeding the fire, which is crucial for achieving a consistent 225°F. When setting up your smoker, start with a moderate-sized fire, using hardwood for a clean burn. Ensure you have enough fuel, as a small fire can easily cool down, while too large of a fire can fluctuate in temperature. It’s important to check the fire every 20-30 minutes to make adjustments as needed, ensuring steady combustion and adequate smoke production.
Vertical water smokers are an excellent choice for low and slow cooking, requiring you to monitor both charcoal and water levels closely. To maintain temperatures in the range of 200–250°F, you need a manageable size fire—typically a small to medium one. Start with a solid base of hot coals and add chunks of wood for flavor; this setup allows for the gradual release of heat and moisture into the cooking chamber. It’s vital to check the water pan about every hour to keep it filled, which helps stabilize the temperature and keeps the meat moist throughout the cooking process.
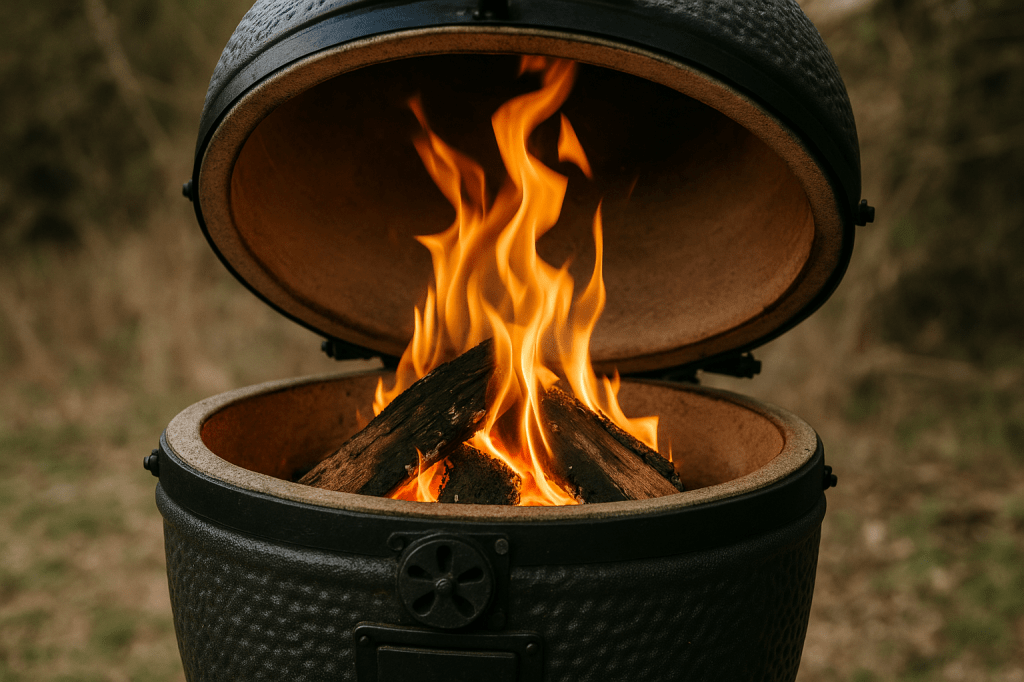
Ceramic kamado smokers offer incredible heat retention and versatility, allowing cooks to adjust temperatures anywhere from 200°F to 700°F. To maintain stable temperatures, managing the size of your fire is crucial. Start with a small to medium fire when slow cooking, gradually adding charcoal as needed for longer cooking sessions. The built-in vents must be precisely adjusted to control airflow; check your temperature every 15 to 20 minutes when starting, and once stabilized, every 30 minutes should suffice. Monitoring is key to ensuring that your kamado stays within the desired temperature range while optimizing the smoke and cooking quality.
Cooking over an open fire is about more than just food—it’s about gathering, sharing stories, and connecting with nature and loved ones. By following safe methods and mastering fire management, you’ll create unforgettable outdoor dining experiences.
Key Takeaways:
– Always use food-safe fire starters.
– Master coal bed management for consistent cooking.
– Prioritize fire safety at all times.
– Understand your smoker’s requirements for fire management.
Serving Suggestions and Pairings:
– Sides: Grilled vegetables, cast-iron potatoes, smoked beans.
– Drinks: Craft beer, smoked whiskey cocktails, fresh lemonade.
Looking for a different music streaming option? Check out a free trial to Amazon Music – Click here!

Leave a comment